On the tab Accesspoints, not only handholes are listed, but any object that grants access to a duct, like ductlinks and ductends, if they are part of the project, or related to it.
This may result in objects being shown, that do not have any work to be done, or are part of another project/contractor.
The accesspoints are shown in a list, sorted alphabetically. The order can be changed by clicking a column header. The column order can be changed by dragging the column to the desired position.
When you double click on a record, the Edit screen is opened. Some fields may be edited here.
Please note:
When the Covered field is set to 'yes', the depth may not be set to 0.
When the Covered field is set to 'no', the depth can only be 0.
The type of Accesspoint object cannot be changed in Field Work.
You can select any accesspoint by clicking the record in the top half of the screen. Additional information will be shown in the bottom half of the screen.
General
The general information on the accesspoint, location, install company, comments, etc.
Geography
In the geography of Field Work the location of the accesspoint may be edited.
|
Options:
|
||
|
|||
|
|||
![]() Placing a new accesspoint object
Placing a new accesspoint object
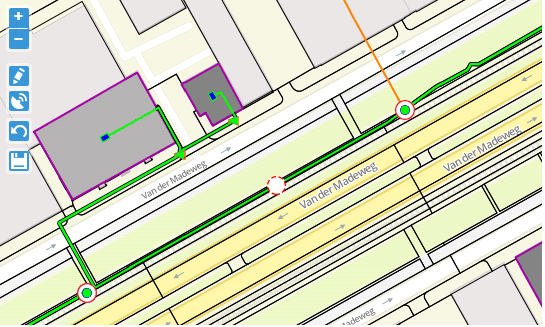
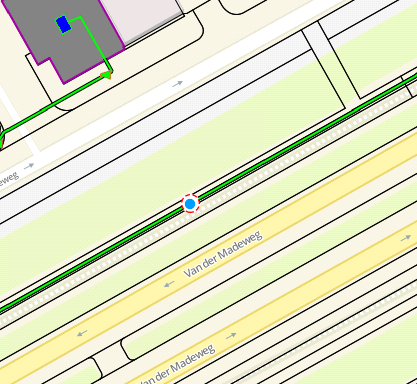
When a ductlink was placed on a route, but it is not shown in the (original) design, it may still be added in Field Work, by clicking the pencil icon ( ![]() ) and selecting the location in the geography.
) and selecting the location in the geography.
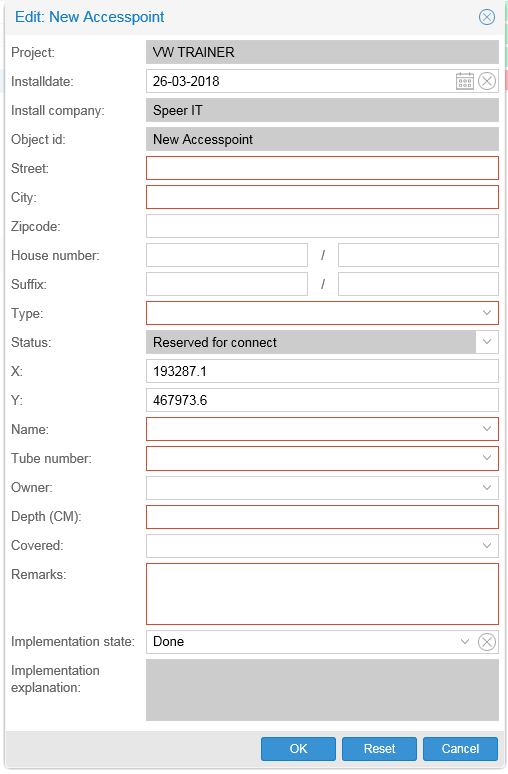
After selecting the location, the screen below will be shown.
|
The red fields are required. After filling in the form, only the address data can be edited, so be sure to check the other information before clicking OK.
Note: you will have to supply address information.
In the type field, you may choose from a list of acceptable accesspoints, as set by the Client.
A route name must be provided, as well as a tube number on which the accesspoint was placed.
A depth and coverage indication are required.
In the Remarks field any comment on the placement or the object that has been placed may be given.
The implementation state will by default be set to 'Done', when you place a new accesspoint.
|
Documents to upload
In the screen the records show the mandatory photos that need to be delivered to either the client or the contractor.
In the column 'send to' either the Client or the Contractor is stated as the intended destination for the document.
Both the Client and the Contractor have to accept the delivered documents before the documents are shown in the linked files.
For more information on the documents see objects and actions.
Linked files
Any documents related to the object, be it enclosure or accesspoint are shown here. Documents may be location / enclosure type dependent.
By double clicking the document is downloaded to the device and may be opened with the intended software.
|
|
© Speer IT B.V. 1999-2018 |