On the page Uploads the user may upload cad drawings or kmz / kml files to CoconTheWeb.
These drawings may be set to public or private.
There is a limit to the amount of layers that will be used in the uploaded file. The layer amount is limited to 10 layers.
Any additional layers will not be used. This limit has been set due to the severity of this action and to maintain usability for the user(s).
On the map of CoconTheWeb, there is a panel on the right side of the screen named Uploads.
These user may select and zoom to the layer. The layer can be turned on/off here as well.
From the Welcome screen you can also start the Uploads module. This page describes the module.
When you doubleclick a record ,the layer is opened and shown in the map.
Uploads options:
In addition to the CoconTheWeb base functionality, as explained in the Reports use page, you may set additional filters on the resulting records, by using the right mouse button.
The buttons are also available in the context menu.
|
Remove the selected layer(s). |
|
When a document has been uploaded, it may be made available to other users in the same environment by setting the publicity. When the publicity is set to yes, the change button sets it to no, and visa versa.
|
|
With this button the style of a single, or multiple layers may be edited. Please see the Style options below. |
|
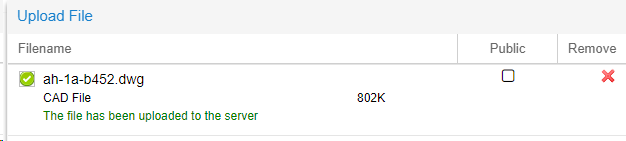
Upload a new file to CoconTheWeb. A new screen opens, allowing you to select a local file. When a file is selected, it is immediately uploaded to CoconTheWeb.
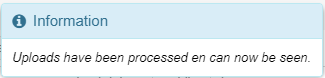
When a upload has been done successfully the notification above is shown. When the uploaded document has been processed successfully, the following notification is shown.
|
|
When a property has been added to a document, this function allows for a search in the document. |
|
When a error has occurred during processing, than this icon is shown in the column Error. If you click the icon, an explanation is given.
|
Style options:
The color, or line thickness of the layer's lines may be changed by clicking the 'Edit style' button.
A new screen opens, with the following available options:
|
Select the type Pointobject for adjustment. If there are pointobject in the layer, the changes will be applied to these objects. |
|
Select the type Lineobject for adjustment. If there are lineobject in the layer, the changes will be applied to these objects. |
|
Select the type Polygonobject for adjustment. If there are polygonobject in the layer, the changes will be applied to these objects. |
|
Change the color of the selected layer. By clicking the square a color palet is shown, with a number of preset colors. The edge of the square, as shown left, will be set in the currently selected color.
|
|
Change the thickness of the lines, in the selected layer. By clicking the pulldown menu, the presets (numbers) are shown and may be selected.
|
|
Reset the layer to the Default values. |
|
Save the changes and close the screen.
|
|
Discard the changes and close the screen. |
Last edited: 05-04-2018
|
|
© Speer IT B.V. 1999-2018 |