In the Drillings screen all types of drillings are shown in the top half of the screen, when they are part of the project, and needs to be build.
A drilling has no relation with a route, however on the geography the entire network is shown, allow relating to other objects.
The drillings are shown in a list, sorted alphabetically. The order can be changed by clicking a column header. The column order can be changed by dragging the column to the desired position.
When you double click on a record, the Edit screen is opened. Some fields may be edited here.
You can select any drilling by clicking the record in the top half of the screen. Additional information will be shown in the bottom half of the screen.
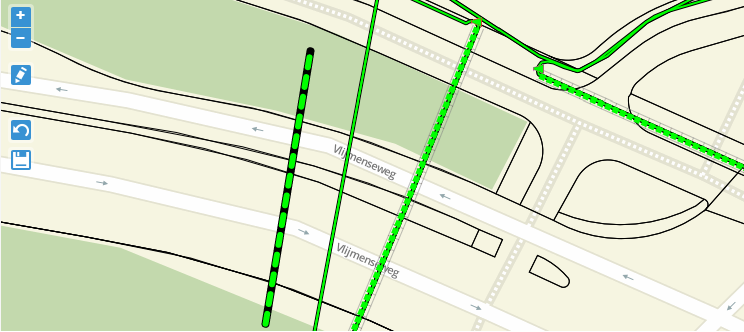
Geography
The selected drilling is shown in the Field Work geography.
|
Options:
|
Editing a Drilling route.
|
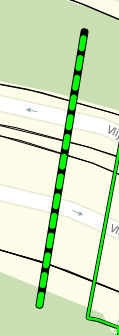
To change the route of drilling, first select the drilling in the geography.
|
|
|
|
By clicking anywhere on the green dotted line, new nodes may be placed. By clicking a node and holding down, the node is selected for editing. On a tablet, press and hold the node.
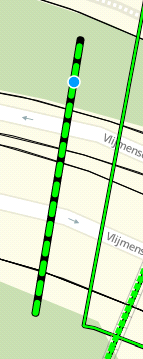
Drag the nod to the new location, to change the route of the drilling.
By clicking once on a node, the node is removed.
|
|
|
|
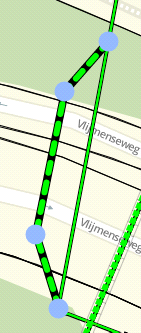
By using a combination of creating new nodes and dragging them to the correct location, the drilling can roughly be shaped to the real route of the drilling.
Please note: after changing the drilling route, use the save button. |
![]() Placing a new drilling
Placing a new drilling
When a drilling is required on a route, but it is not shown in the (original) design, it may still be added in Field Work, by clicking the pencil icon ( ![]() ) and selecting the location in the geography.
) and selecting the location in the geography.
The screen below will be shown.
|
Apart from the remarks field, all other fields are required.
The noted length is based on an estimation, based on the geographical length. This length may have to be adjusted manually.
|

Documents to upload
In the screen the records show the mandatory photos that need to be delivered to either the client or the contractor.
In the column 'send to' either the Client or the Contractor is stated as the intended destination for the document.
Both the Client and the Contractor have to accept the delivered documents before the documents are shown in the linked files.
For more information on the documents see objects and actions.
Linked files
Any documents related to the object, be it enclosure or accesspoint are shown here. Documents may be location / enclosure type dependent.
By double clicking the document is downloaded to the device and may be opened with the intended software.
|
|
© Speer IT B.V. 1999-2018 |