With this function the data of the patch panels may be changed.
This function may be called up from both the Register menu and the Reports menu. In the first case the data may be both consulted and changed. In the latter case the data may only be consulted.
The following actions may be taken in this screen:
|
Through the yellow input field you may search for a (part of the) location name / frame name/ termination unit number |
|
Search for the selected item. You may choose whether the search will take place on Location or Cable name. |
|
Browse through the patch panels that comply with the search item you entered. |
|
With this, all farthest endpoints of all patch positions for the selected patch panel are determined and saved until a new synchronization takes place. |
|
Close this window |
|
Cancel all changes. |
|
Confirm the insertion of new data or the changes of existing data. |
|
Go to the "Report splice shelves" screen in which the splice shelves for this frame are displayed. |
|
Go to the fiber usage for the selected frame. |
|
Go to the "Enter and change Patches" screen. |
|
Go to the layout of the frame of this frame. |
|
Export data to Excel and open the Excel file. |
|
With this you remove the current patch panel, including all fibers. A check will take place whether there are still positions in use with a section name, and these need to be released first (if they are indeed free). A check will take place whether there are still positions in use by a patch, and these need to be removed first (if they are indeed free). Furthermore, a check will take place whether this patch panel is associated with a cable work or not. |
|
Display the frame in the geographical screen. |
|
Display the connection of the first fiber from the selected cable (fiber series) in the screen. Connection report" |
|
Display the usage report of the selected cable. |
|
Shows a report on usage by customers of all involved cables |
|
With this button you can change the name of the frame, through the "Enter/change frame" screen. |
|
Display a list of files linked to this locations. |
|
Maintain questions on this project. |
Other actions:
|
Open selected frames' properties. |
|
With this button the adjacent field is filled with a space. |
|
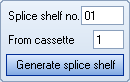
After activation of this button, a splicing shelf is made based upon the data of the selected patch panel. |
|
Create a new patch panel |
These actions may be used to modify or add data in the grid:
|
Add a line. |
||
|
Remove the selected line. |
||
|
Duplicate the selected line, which is patched in an ODF frame. The tray number will be increased. |
||
|
Duplicate the selected line, which is patched in a non-ODF frame. The tray number will not be increased. |
||
|
With this you can create detail records batch by catch, through the Generate detail records" screen. |
||
|
With this, the detail records of this frame will be removed.
|
||
|
Combines the current line with the previous line. Conditions are that the following data is the same in both lines: To PPS, Traynumber, Cablename, Endpoint and Cable ID. Furthermore, Fiber high needs to be 1 lower than the Fiber high in the previous line and Position needs to be 1 lower than the Position in the previous line. |
||
|
You may enter a number here, after which this number of lines is split from the current line, beginning with the lowest fiber. |
||
|
You may enter a number here, after which this number of lines is split from the current line, beginning with the highest fiber. |
||
|
Change Connector |
Last edited: 06-10-2017
|
|
© Speer IT B.V. 1999-2018 |